
Pick a level spot, plan the layout, pour or resurface, paint lines, and install the net.
Curious about how to build a pickleball court that plays true and lasts? You’re in the right place. I’ve helped homeowners, HOAs, and schools build and stripe courts from the ground up. In this friendly guide, I’ll show you how to build a pickleball court step by step, with real tips, clear numbers, and easy choices that fit your space and budget.

Plan your project
Good courts start on paper. Map your space, your budget, and your rules. This is where how to build a pickleball court becomes simple and stress free.
- Pick a spot with firm ground and good drainage. Avoid low areas that hold water.
- Aim the court north to south to cut sun glare.
- Check local codes, HOA rules, and setback lines. Ask if you need a permit.
- Talk with neighbors. Pickleball is louder than tennis. Plan distance, fences, or sound screens.
- Choose one court or more. Leave safe run-off room.
Space needs to remember:
- Playing lines are 20 by 44 feet.
- Minimum total area is 30 by 60 feet.
- Ideal total area is about 34 by 64 feet.
From experience, a clear plan saves money. One HOA I worked with moved the slab two feet to miss a drain line. That small shift avoided a costly tear-out later. Think through your site now to avoid fix-it work later.
Key goal right here: write down why you want this court. Training? Community play? This drives surface, lights, and extras.
Choose your court type and surface
When you learn how to build a pickleball court, the first big choice is new build or convert.
- New build on bare ground. Best for a custom layout. Higher cost. Longest life.
- Convert an old tennis or basketball court. Fast and cost friendly. Add pickleball lines and nets.
Surface options:
- Asphalt. Common outdoors. Good value. Needs a 1 percent slope for water runoff. Resurface every 5 to 8 years in most climates.
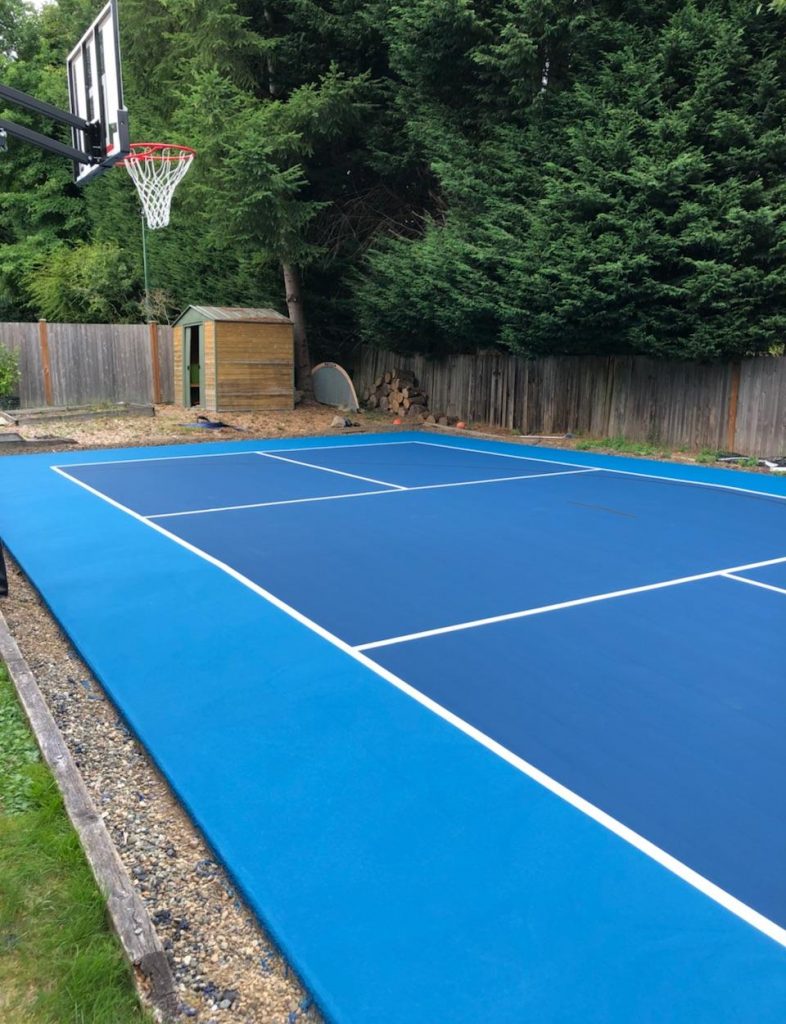
- Concrete. Hard, flat, long life. Needs control joints and crack care. Use an acrylic cushion or membrane to reduce “reflective” cracks.
- Modular tiles. Snap-together panels. Fast to install. Good for rooftops or rentals. Softer underfoot. Lines can be part of the tile or painted.
Coating and color:
- Use acrylic sport coatings for grip and ball bounce.
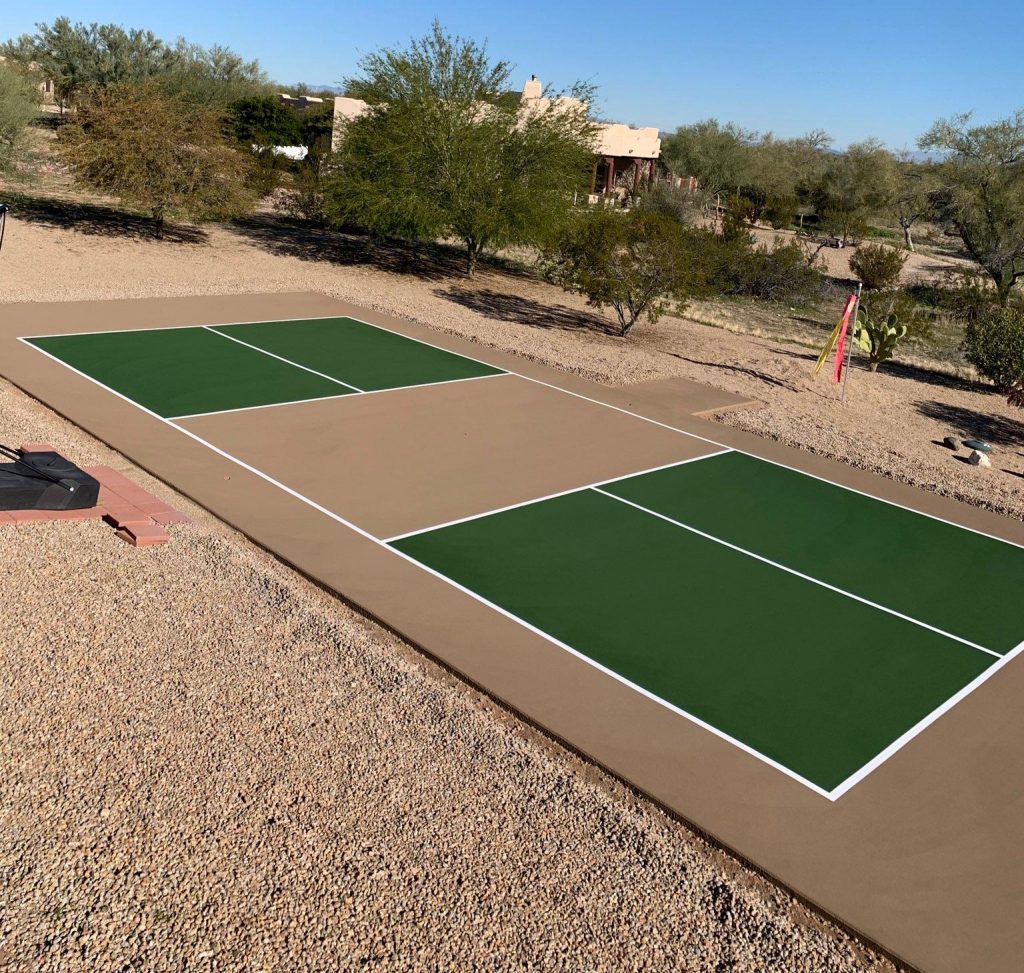
- Pick light to medium colors for the inbounds area. Darker for out-of-bounds. White lines give best contrast.
Indoor notes:
- Keep the floor clean and dry. Use a ball made for indoors. You can stripe wood or use roll-out tiles.
If you ask me how to build a pickleball court that is easy on joints, I like an acrylic cushion system on asphalt. It costs more up front. It feels better for the knees and lasts.

Tools, materials, and cost breakdown
You can DIY or hire pros. Here is what you need to plan how to build a pickleball court the right way.
Core tools:
- Tape measure, chalk line, stakes, and string.
- Laser level or builder’s level for slope.
- Plate compactor for base rock.
- Asphalt or concrete tools if you pour.
- Paint rollers, squeegees, and masking tape for lines.
Materials:
- Crushed stone base, 4 to 6 inches.
- Asphalt in two lifts, or a 4 to 5 inch concrete slab with steel or fiber.
- Acrylic sport coating, 2 to 3 color coats.
- Striping paint, white, 2 inches wide.
- Net posts, sleeves, and regulation net.
- Optional fencing, gates, windscreens, and lights.
Typical cost ranges:
- Stripe and net on an existing court: about $400 to $3,000.
- New outdoor asphalt court, coated and lined: about $22,000 to $45,000.
- New concrete court with cushion system: about $30,000 to $60,000.
- Fencing per court: about $8,000 to $18,000 depending on height and gates.
- LED lights per court: about $10,000 to $25,000.
Prices vary by region and supply. Get three bids. Ask for a written scope and a timeline.
Step-by-step: how to build a pickleball court
Use these steps whether you build one backyard court or a set of four. This is the core of how to build a pickleball court the smart way.
- Survey and layout
- Mark a rectangle at least 30 by 60 feet.
- Set string lines and check corners are square using 3-4-5 or a laser.
- Excavate and base
- Remove sod and soft soil to firm subgrade.
- Add 4 to 6 inches of crushed stone. Compact in thin layers.
- Form a consistent 1 percent slope in one direction.
- Pave or pour
- Asphalt: place binder and top course to a total of about 3 inches compacted.
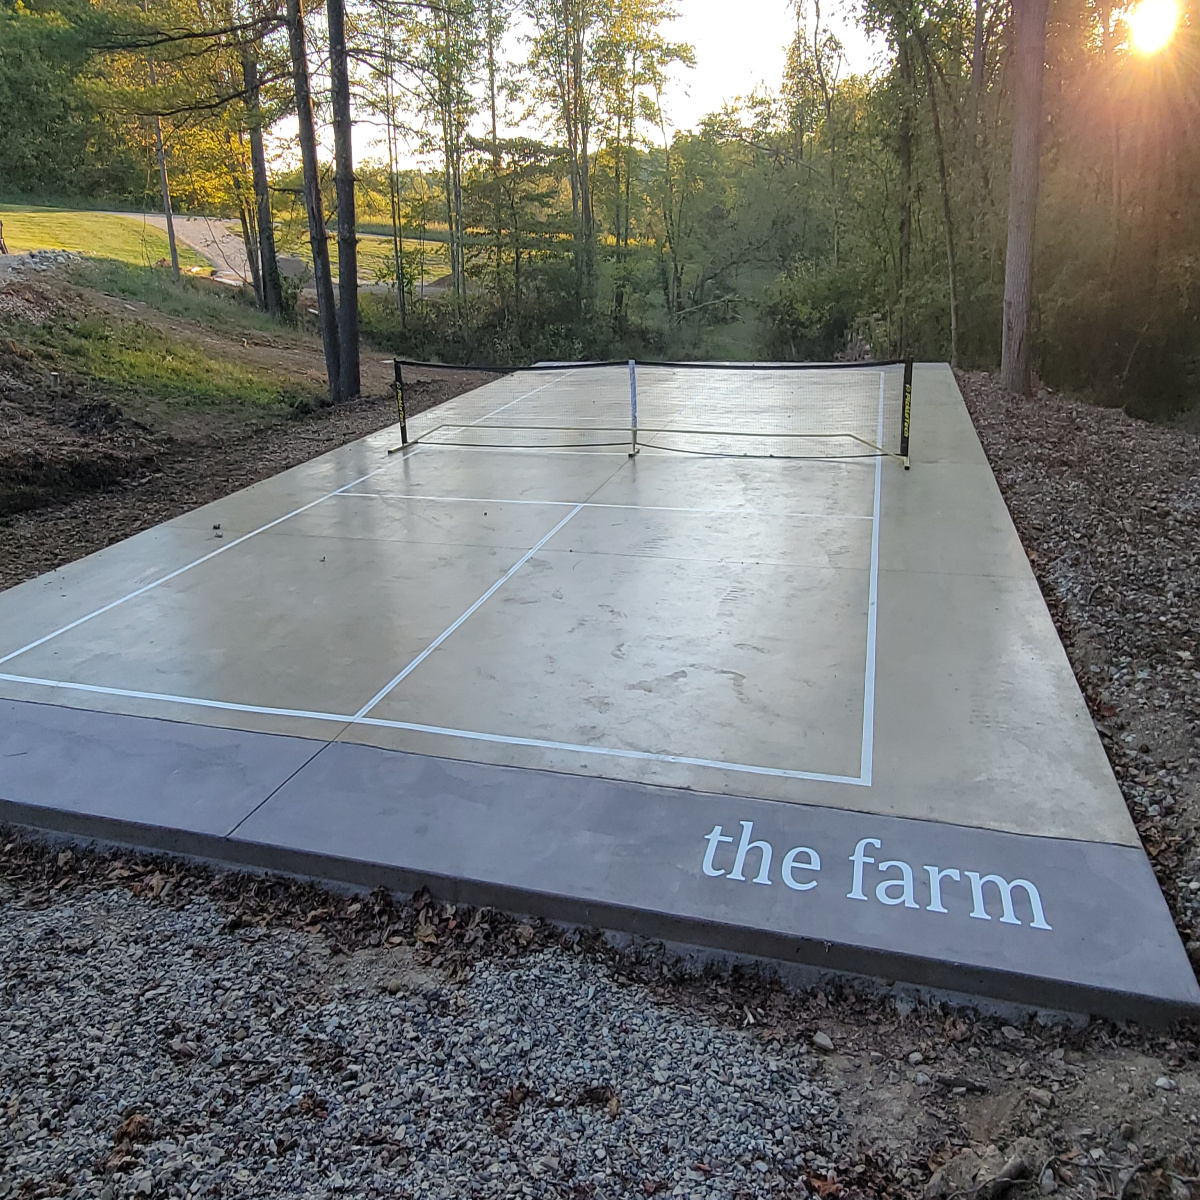
- Concrete: pour a 4 to 5 inch slab with rebar or mesh. Add control joints per spec. Use a broom finish.
- Cure and prep
- Asphalt cures fast. Many crews coat after a few weeks.
- Concrete needs 28 days to cure for coatings. Keep it moist early to reduce cracks.
- Surface coating
- Clean the slab. Fix holes and hairline cracks.
- Apply acrylic resurfacer, then 2 to 3 color coats with a squeegee.
- Follow temps on the label. Work above 50°F and in dry weather.
- Stripe lines
- Snap chalk lines with care. Mask edges.
- Paint 2 inch white lines. Let dry per label.
- Net system
- Set net post sleeves so the inside is 22 feet apart.
- Net height is 36 inches at posts and 34 inches at the center.
- Perimeter and extras
- Add fence, gates, and windscreens as needed.
- Install lights, benches, and ball holders.
Tip from the field: I set one test line with blue painter’s tape before painting the court. We roll a ball to check glare and contrast. Small tweaks here save re-work later.

Dimensions, markings, and net setup
Getting the lines right is the heart of how to build a pickleball court that feels pro.
Core dimensions:
- Court lines: 20 feet wide, 44 feet long.
- Non-volley zone, called the kitchen: 7 feet from the net on both sides.
- Service boxes: divide each side into left and right halves with a center line.
- Baseline at the back. Sidelines on the sides. All lines are 2 inches wide.
Net details:
- Net spans 22 feet between the inside faces of the posts.
- Height is 34 inches at center. Height is 36 inches at each post.
- Use a center strap to hold the middle height steady.
Marking steps:
- Find the court centerline. Mark net line first.
- Mark the kitchen at 7 feet from the net on both sides. Draw that full width.
- Mark sidelines at 10 feet from center on both sides.
- Mark baselines at 22 feet from the net on both ends.
- Add the service center line, from the kitchen line to the baseline.
Orientation:
- Aim the long axis north to south when possible. This cuts sun glare in morning and evening play.
Quality check:
- Measure corner to corner both ways. The two diagonals must match. That means the court is square.

Safety, drainage, and maintenance tips
Safe courts get used more. When you plan how to build a pickleball court, bake safety and care into the design.
Drainage tips:
- Keep a 1 percent slope. That is about 1.2 inches drop over 10 feet.
- Carry water off the court, not across walkways.
- Avoid tree roots under the slab.
Fencing and wind:
- Use a 10 foot fence for busy sites. Go 8 feet if you want more view.
- Add windscreens to cut glare and reduce ball drift.
- For noise, try acoustic panels or extra space from property lines.
Lighting:
- Use four LED poles per court, 18 to 20 feet high in many setups.
- Aim for 30 to 50 foot-candles, even and glare free.
- Pick 4000K to 5000K color for a clear ball view.
Maintenance:
- Blow or sweep weekly. Keep sand and grit off the paint.
- Wash with mild soap each season.
- Touch up lines as needed.
- Recoat acrylic surface every 4 to 8 years based on use and weather.
Winter care:
- Do not let ice sit if you can help it.
- Avoid sharp snow shovels. Use a rubber edge or soft broom.

Common mistakes and how to avoid them
If you want to know how to build a pickleball court without regrets, skip these traps.
- Skipping geotech review. Soft soil leads to cracks. Compact in thin lifts and test density.
- No slope. Standing water ruins coatings. Set grade lines before paving.
- Thin base. A weak base makes waves. Use at least 4 inches of compacted stone.
- Wrong line layout. Confirm every measure twice. Check diagonals before paint.
- Cheap paint. Use sport-grade acrylic for grip and UV hold.
- Wrong net height. Use a center strap and a tape. Set 34 inches at center.
- Ignoring neighbors. Add distance, fences, and trees to cut noise.
One client once asked why the ball skidded after rain. The court had a low spot. We used a patch leveler and solved it. Find puddles right after the first wash and fix them early.
Timeline and project management checklist
A solid plan keeps stress low. Here is a clear path for how to build a pickleball court on time.
Typical timeline:
- Planning and permits: 2 to 6 weeks.
- Site work and base: 3 to 7 days.
- Asphalt or concrete: 1 to 2 days.
- Curing: asphalt a few weeks, concrete 28 days.
- Coating and striping: 3 to 6 days, weather based.
- Fence and lights: 3 to 10 days.
Checklist:
- Confirm site, slope, and drainage plan.
- Lock budget and contractor scope.
- Approve colors and line layout.
- Schedule weather windows for coating.
- Do a final punch list: net height, line crispness, gate latches, lights focus.

Budget-saving ideas and smart upgrades
You can tailor how to build a pickleball court to your wallet without hurting play.
Ways to save:
- Convert an old tennis or hoops slab. Add lines and portable nets.
- Share fencing on multi-court layouts.
- Install lights later. Plan conduits now to save trenching later.
- DIY coating and striping if you have time and a small crew.
Upgrades that matter:
- Acrylic cushion layers for comfort.
- Benches, shade sails, and bottle fillers for happy players.
- Permanent net posts with internal winders for easy setup.
- Court numbers, scoreboards, and storage to keep play smooth.
If you host clinics, add one extra gate and a small equipment shed. It makes a big difference in day-to-day use.
Frequently Asked Questions of how to build a pickleball court
What is the minimum size area I need?
A single court needs at least 30 by 60 feet. If you can, aim for 34 by 64 feet for better safety zones.
Can I paint lines on my driveway?
Yes, if it is flat and in good shape. Use sport acrylic paint and a portable net for easy setup.
Which is better, asphalt or concrete?
Both work. Asphalt is cost friendly and flexible. Concrete is long lasting but needs crack control and a good coating system.
How high should the net be?
Set 36 inches at the posts and 34 inches at the center. Use a center strap or a simple tape check before play.
How long before I can play after coating?
Most acrylic coatings need at least 48 hours in good weather. Cooler or damp days need more time.
Do I need a permit?
Many places require a permit for new slabs, fences, or lights. Check with your local building office early.
What color should I pick?
Use medium colors on the inbounds area and darker out-of-bounds. White lines give the best contrast for the ball.
Conclusion
Now you know how to build a pickleball court from the first stake to the last line. You picked a site, planned the slope, chose a surface, and set the net right. With simple steps, smart choices, and a few pro tips, you can create a court that plays great and lasts for years.
Ready to turn plans into play? Start your layout this week, get a few bids, and set a timeline. If this guide helped, share it with a friend, subscribe for more how-to projects, or drop your questions in the comments so we can help you serve up game day fast.